Monday, January 29, 2018

Some Problems with Home Incubating - Week 4 2018


Some Problems with Home Incubating

A couple of years ago I thought I would like to incubate some eggs. I bought a cheap incubator on Ebay. Then I tracked down a man who kept Light Sussex chooks and asked if I could have some fertile eggs. He very kindly dropped a box off at the local feedstore. My first lesson was that they were all placed rounded end up. I diligently filled the water and programmed the temperature. Most incubators have automatic turners and maintain a constant set temperature.
I hatched out 6 chooks from 12 eggs which I thought was OK for a first time. I hatched out three more batches with the best success being 9 and the least successful being 3.

Then the cheap incubator died. You get what you pay for so if you spend less than $50 on an incubator - it is unlikely to last. 

So I researched and splashed out closer to $500 on this US incubator. It takes 24 eggs and I could see my flock expanding. I had several people ask me for hens so I confidently said that I could breed them some. Five batches later the best I had managed was 3 out of 15 eggs. In winter I did not have enough fertile eggs laid in the week before so it mainly a spring and summer task. It takes 21 days for them to hatch out so I had to look carefully at the diary to make sure that I was not too busy on Days 18 and 21.


I could not work out why my hatching rate was so poor. I googled. I cracked open the eggshells at the end and found that almost all were just unhatched chicks - something had stopped them hatching.

With this model there are two trays at the bottom - the dark green parts on either side of the motor. One was filled for the first 18 days and both for the last 3. However it was very hard to keep the water up - even with checking it last thing at night it could be nearly dry by morning.

I googled some more. The humidity is the most crucial factor. Losing some heat is OK now and then but if the humidity drops then the chicks don't develop.

I needed a hygrometer. $25 on Ebay and a week later I had one, ready for Day 2 of the next batch. I placed it in the incubator at the same level as the eggs and waited. The results were very revealing. If my hygrometer is correct then there was no way that one full water tray would keep humidity between 40 and 50 percent. Only by filling both did I get to the required minimum. 
The temperatures were not the same. The 37.9 degrees set on the incubator delivered an actual heat of over 39 degrees. At some time there was more than two degrees discrepancy.

So by reducing the temperature setting and increasing the water I could keep this set of eggs closer to what was required for effective hatching. If I relied on my expensive incubator I would get only the very hardy chicks to hatch. Be very wary and check with a hygrometer.


Today is Day 21 and one chick has made it early. It can stay in the incubator for at least 24 hours before needing water. At the end of the day it was moved to the brooder box and I dunked its head in the water. It will find the food itself. Despite a very hot day I turned on the lamp attached to a timer so it has some warmth all through the night. There is some more cheeping from the remaining eggs so it may have some peers by the morning.

Maybe I have solved the problem - time will tell.


Sunday, January 21, 2018

Week 3 2018 - The Shearing Shed Yards, Cherries and Basil

This week has been hot and humid, with some amazing thunderstorms and lightning shows. Some days when it was too hot to venture away from the shade and some early mornings to avoid the heat.

Our main task this week has been to build a yard at the back of the shearing shed and to complete the chute. The whole project of building the shed has been going for nearly three years but this week has seen it reach usable status.


The Red Box posts were cut on our other property and while not exactly straight are almost termite proof and so will stay strong in the ground for a very long time.

The next job was to dig holes and put the posts in. The timelapse film below was taken by our Wwoofer on her GoPro and makes us look like fast workers!


Once the posts were in then stays could be fitted with one end notched into the post and one end stopped with a large stone block. When the fence wire is tightened the stay prevents the top of the post being pulled over. Then star pickets were spaced between the posts positioned by a single taut wire. The ringlock fencing wire is ready to be rolled out.


Once the wire was attached then two sides of the shed needed to be slatted to keep the sheep from escaping underneath. The trick was to attach wooden uprights to the side of the concrete stumps and then nail the slats to them. 


This time of year is harvesting and processing. Our neighbour has a cherry tree that was laden and despite nets the birds were being keen. So six of us turned up and picked 13kg in less than an hour.


So we pummeled some with a potato masher and boiled it up to extract the juice for cherry jelly.


We pitted hundreds for dehydrating.


Dried cherries are great to add to muesli, so I am told and now I can find this out!
Something for the kids to do on a hot summer afternoon - pit cherries for cherry chafoutis and cherry pudding with pink custard! Yum.


14 jars of cherry jelly for the pantry.


Separating the basil leaves from the stalks.


1/3 cup of pine nuts, 3 cloves of garlic, 1/2 cup of olive oil, 1/2 cup parmesan cheese and lots of basil leaves makes pesto.


Frozen in ice cube trays they make a taste bomb!

Tuesday, January 16, 2018

Week 2 2018


Week 2 2018

This week started really hot, went through thunder and lightning, headed jumper cold with snow down to 1500m and ended in damp drizzle. We pumped up four full tanks of water from the house tank and the dam levels started to go up.

On Monday we collected a WWOOFer from Cooma. Margot, a university student from Paris, was keen to spend some time on the farm and improve her English. WWOOF stands for Willing Workers on Organic Farms and is a great way for travellers to find hosts - free board and lodging in exchange for at least four hours a day labour. I spent many months doing this in Australia, New Zealand and England and learnt a lot. Wwoofers give us the chance to concentrate on a few projects that would be onerous and put off without help and to share our farm and our food with interesting people.


Our two Duroc pigs, Chocolate and Caramel, are no longer piglets and have managed to turn over all the soil in their 12m by 6m pen. It was time to give them a fresh patch. Pigs are homebodies and once they have worked out their patch they can be reluctant to move. They also have a very healthy respect for electric fences so we could remove the outside panels and set them up around the new patch without the pigs escaping. They stayed behind the electric wire until we were almost done. Chocolate is the dominant pig so he went into the new pen happily while we had to chase Caramel to step over the line between old and new pens even though there was no barrier there at all.

The older the pigs get the quicker they turn over the soil and the more often the pen need to be moved. We bought these pigs in November and they are fattening fast - with fallen apples and excess zucchinis gradually replacing the grower pellets. By March they should reach 70 kg and head off for their one bad day.

The next task was to pick the three blackcurrant bushes. With four children and two adults it took about an hour to strip the bushes. We picked just over 4 kg.
 For preserving recipes our go-to book is 'A Year in a Bottle' by Sally Wise and her recipe is:

2 kg blackcurrants, washed, stalks removed
4 cups water
3 kg sugar
60 g butter


After bringing the currants and the water to the boil and cooking for 10 minutes, we added the sugar and cooked until it was dissolved. Then we added the butter and boiled hard until the setting point was reached. 
This made 18 jars (mostly 375 ml ones).

At Opportunity Farm we have four sets of chooks - two in mobile chicken tractors and two in fixed pens. The latter have been used as pens for a long time. Each year we clean them out to remove most of the manure. This manure is very high in nitrogen but needs to be composted before going on the garden. Four full wheelbarrow loads were trundled off to the compost heap and mixed with lawn clippings, waste wool and dried weeds - to be left until spring.


Once the pens were cleaned of poo, we washed down all the walls and surfaces with a dilute solution of a pyrethrum based powder that eradicates and prevents mites. We have only had one outbreak at Opportunity Farm but it seems sensible to be proactive while we are cleaning the pens.

We have been slowly building a shearing shed for our small flock of sheep. The building is almost complete but we need to set up some yards and fencing to direct the sheep into and out of the building. For fencing we needed posts. Our other property has 300 acres of bush and most crucially plenty of red box trees. These have the advantage of being too dense to be eaten by termites and the disadvantage of not being straight. There are plenty of young trees about 20-25cm in diameter. From most such trees it is possible to cut two posts and maybe two stays. The stays are the support posts that angle into the ground from the main post to keep it upright when the fence wires are tightened.


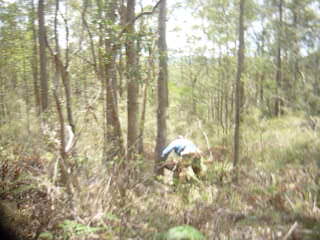
Dropping a Red Box tree to make posts


Trimming the tree to make stays (note the bendy trunk!)

Once the posts were dropped off back at the Farm we dug some holes. Each hole was dug so that a third of each post is in the ground ie a post of 2.1m length goes into a 0.7m hole.

Before we could site all the posts I needed to build a chute. This is a ramp down which the shorn sheep is pushed once shearing has been completed. The chute is about 500mm wide and 1200 high.
I chose to make the ramp out of palings and the walls and roof from corrugated iron. All the components except for the palings came from a collapsed shearing shed a friend allowed us to remove. The round posts were trees cut in the 1950s and now reused 60 years later.
To complete the walls and roof I need some more roofing screws so it will need to be finished later.


Monday, January 8, 2018

Week 1 2018


The first week of the year started cool and finished with the hottest day since WW11 started. There was a little rain but finally the pump was needed daily to water the gardens. 

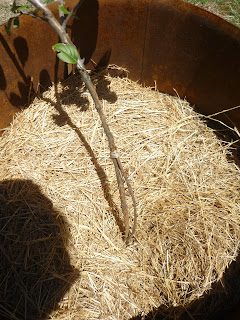
While we were away we had a disaster - the guinea pigs free ranging in the dwarf tree orchard did what any hungry guinea pig would do (but I didn't realise they could do) and leapt up and over the tree guards - made from 1/3 of a 44 gallon drum - and gnawed the bark all around the trees. 
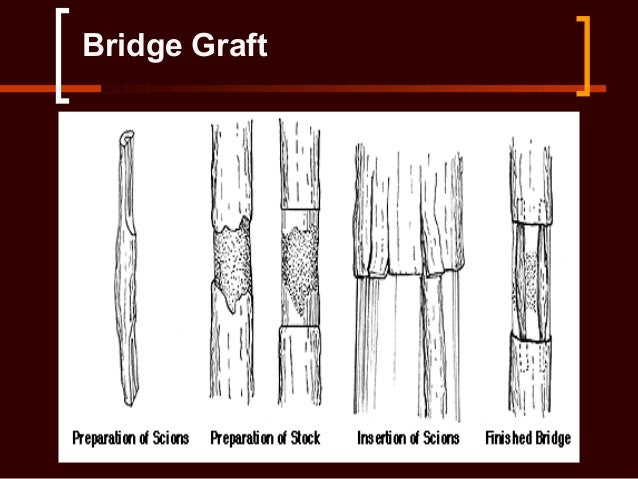
The only chance of saving any of the trees was a bridging graft. To do this I cut a sucker from an apple tree about four cms longer than the debarked section and cut a diagonal on each end on the same side so that it would sit flat on the tree.


I have never grafted before but armed with whittling knife and some old tights as binding I put six grafts in five trees. I will be very excited if even one works! 
With help from the kids we caught ten guinea pigs and returned them to the cages in the lawn where hopefully they get more attention and feed.

Image result for bridge grafting 

On Wednesday I went to our other property to see how the gardens and orchards there were going. The tomatoes were going gangbusters. I always grow my tomatoes up a piece of bailer twine attached to the roof of the caged garden. I also pinch out all the laterals so there is a single growing stem. This means that all the tomatoes are supported, up off the ground  and with enough air flow around them. This method also allows me to plant more plants in a bed.


The zucchinis are often the first summer crop to fruit. This one is a yellow variety which I am trialling. I usually prefer the Costata which grows well in a cooler climate. While zucchinis can usually over-produce we have an excellent solution - feed them to the pigs. 


The next job was to summer prune the stone fruit. When I planted these trees dwarf varieties were far less common and so it is a challenge to stop the trees growing through the roof. In Spring the tree puts lots of energy into growing new branches and these use up lots of energy and stifle the tree with new leaves. This year I decided to cut these branches out so the tree can concentrate on developing the fruit. Last year I did one of the apples and after pruning the stone fruit I noticed that this tree has less fruit than the others so I shall have to find out whether my pruning has this effect.


In the apple orchard the first fallers needed collecting for the pigs. To assist with pest control all the fallen fruit is taken. We have had a problem with brown rot and removing any diseased fruit helps keep this in check. I also collected a sackful of lemons and tangelos for making cordial.

Image result for fleshing bench
Fleshing Board - mine is a curved one but works the same way.

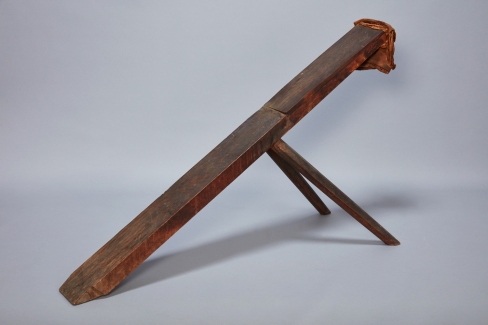
I was asked to make a fleshing bench for a friend. This is used to put a hide on and work it to remove the flesh. To make one I needed to drop a tree with a diameter of about 30cm, cut off the bottom 2.4m and debark it. By using a Stringybark the bark peels off fairly easily. Then I used wedges to split the log in half. When I got it home I made a removable stand from a stool frame that I had rescued from the tip. 
Fleshing Bench and Stand Mark 2

One of our sheep is a Dorset. The fleece is not much use for spinning so Michelle uses to make batting - the felt for a quilt, perhaps. So this week so painstakingly teased out the fleece and evenly spread on piece of plastic. The fleece was wrapped in a nylon curtain and hot soapy water poured onto it. This was rubbed into the fleece so it flattened and the fibres enmeshed. Once this was done the felted fleece was placed on a raised flyscreen so the air can dry it. 

The original wool at the top and the felted batt at the bottom

This week we also harvest the redcurrants. We have two bushes that are always laden at the start of the year. With a tag team of children they were picked within an hour and the currants were then washed, drained, cooked and then the flesh put through a seive so that only the juice remained. This was then cooked until the setting point was reached. We tested this by putting a saucer in the freezer, periodically removing it and putting a drop of the mixture on it. Once the cooling effect of the plate had reduced the temperature of the jelly the saucer was tipped. When the jelly stayed put the tipping point had been reached. This year's harvest made 15 jars of jelly. 


It was also time to separate last year's kids from their mothers. This allows the mothers to have a rest before cycling and pregnancy and prevents our buck, Curly, from impregnating his young daughters. We penned the goats up and put collars on the kids to be removed. Then we could attach leads so they could be encouraged the distance to their new paddock. With me holding the leads of two kids and a child standing behind the kids inside their comfort zone this was accomplished fairly easily. There has been some serious bleating from the kids who are still within sight of their mothers but none of them has escaped.... yet, and they are settling into being their own small herd.


Tuesday, January 2, 2018

Cleaning the Lavender


Cleaning the Lavender

This year the lavender is looking good and we are just about ready to harvest. All we need is a couple of sunny days to make sure it is dry. So we reckoned it was about time we looked at last year's lavender. It has been sitting in a wool bale for 12 months so we were a bit apprehensive as to how it would turn out. Apart from a couple of dead mice it didn't look too bad so we picked out the stalks and shook them to let the flowers fall to the bottom. It was very dusty so we wore dust masks while we did this first stage. Once we had cleared much of the plant matter into a box then we progressively seived the remainder to separate out the flowers from the stalks. A seedling tray did the trick. 


Then it was time to spread out the flowers on a flyscreen to allow the dust to fall through. Whilst spread we could spot the red droppings of the dying mice and remove them by hand. After all that we could pick up the flowers and store them in a 5 litre plastic bucket. 


Now we can use the lavender to keep the moths away and make our clothes smell nice. This variety of lavender has oil that has a high camphor content so it is not ideal for pillows.
Next job - cut the lavender for this year's harvest!