Sunday, May 1, 2016

Garlic Planting

Our tradition is to plant the garlic as close to Anzac Day (25th April) as possible. So this year on the 26th it is time to clear the bed of its assortment of lanky tomatoes, overgrown radishes and beetroots and a weed or two and ready it for the garlic.
 
 
After weeding and forking the bed, my daughter (who miraculously decided to be helpful) separated the cloves. Lines were raked and the garlic placed carefully and regularly.


Five rows with a path down the middle should be enough for this bed. A similar amount planted at our other property should provide us with enough garlic for the next season. This variety is an early one which means we can pick it in November when the bed can be used for some later summer crops.


Ear Tagging the Pigs

The pigs are getting fat and the weather is turning cold. Time to take them for their one bad day. In order to identify them they need to be eartagged and branded.
 
 
The ear tagger is a simple device that locks a plastic tag through the ear making the hole with the connector. It is a swift procedure once the ear is in place.


Having missed the first time the pigs were not that keen on having their ears held for long enough for a sharp plastic tag to cut through their lobes. BoBo was definitely unwilling and is seen here backing away squealing. It took a few minutes being patient to find the right moment and the deed was done.

 
Food is always a good distracted for pigs. I have parked the trailer in their pen and begun to put some food on it. The pigs are learning to leap on which will make it much easier for loading them up. It is always sad to say goodbye to the pigs as they are such characters with very knowing eyes but it would be hard to feed them through the winter. At last measure they are about 65kg each so there should be plenty of pork about in a couple of weeks.


Sunday, April 24, 2016

Watering the Pigs

 
Some years after we purchased Opportunity Farm we found a well. We knew that there might be one but had not sought to find it. Anyway its location was pointed out and we investigated to find a beautifully constructed dry stone well - about 3.5m deep - that tapped into groundwater that flows into the boggy area below our property.
After cleaning up the rotten timber and leaves that had been covering it, we raised the sides to above ground so we could put an effective cover on it.
 
Then we put in some concrete stumps nearby to make a tank stand and assembled a tank which is filled by a submerged pump powered by two solar panels. Once the tank is full the pump turns itself off.
 
 
The tank gravity-feeds via a hose to the pig pen. The pigs nudge an automatic waterer and have a drink whenever they want to. When we go down to feed them and the weather is hot we can use the water to fill a trough so that they can have a bathe and cool off. It was a reasonable expense in money and time to set up but we now have a piece of infrastructure that makes raising the pigs much easier and the pigs much happier.


The waterer and the pig trough. Before the pump was put in we had to fill the trough up twice a day by bucketing from a nearby dam. The pigs would then jump in and spill much of the water leaving either none to drink or just an unappetising or healthy muddy puddle.

Artichoke Harvest

We have one bed in our garden that grows Jerusalem artichokes. At this time of year all the plants are dug up and the soil carefully checked for tubers. Despite this attention the bed is full of artichokes the next autumn. We sometimes eat them ourselves and they taste like a nutty potato but they are hard to clean and too knobbly to peel effectively. It is also important to remove the skins or they have a tendency to cause bloating.
We use them as pig food. With only a short while left before the pigs are slaughtered these artichokes will make up a considerable part of their diet. One bed 2m x 1m yielded this trug full and two more 10litre containers. Not bad when you don't have to plant them.
 

Preserving in Mid-Autumn

It is past mid-autumn and so far no frosts. There is still plenty growing and plenty to preserve. We had some nashis picked so these were split between eating and bottling. I looked up on Sally Wise's website (she has written an excellent book on preserving called 'A Year in a Bottle' and she recommended using an apple corer and peeler and then putting rhubarb sticks in the hole. It seemed like a good idea to provide an aesthetic contribution to my preserves for next year's show but apart from a couple of jars I would just peel and chop them.
 

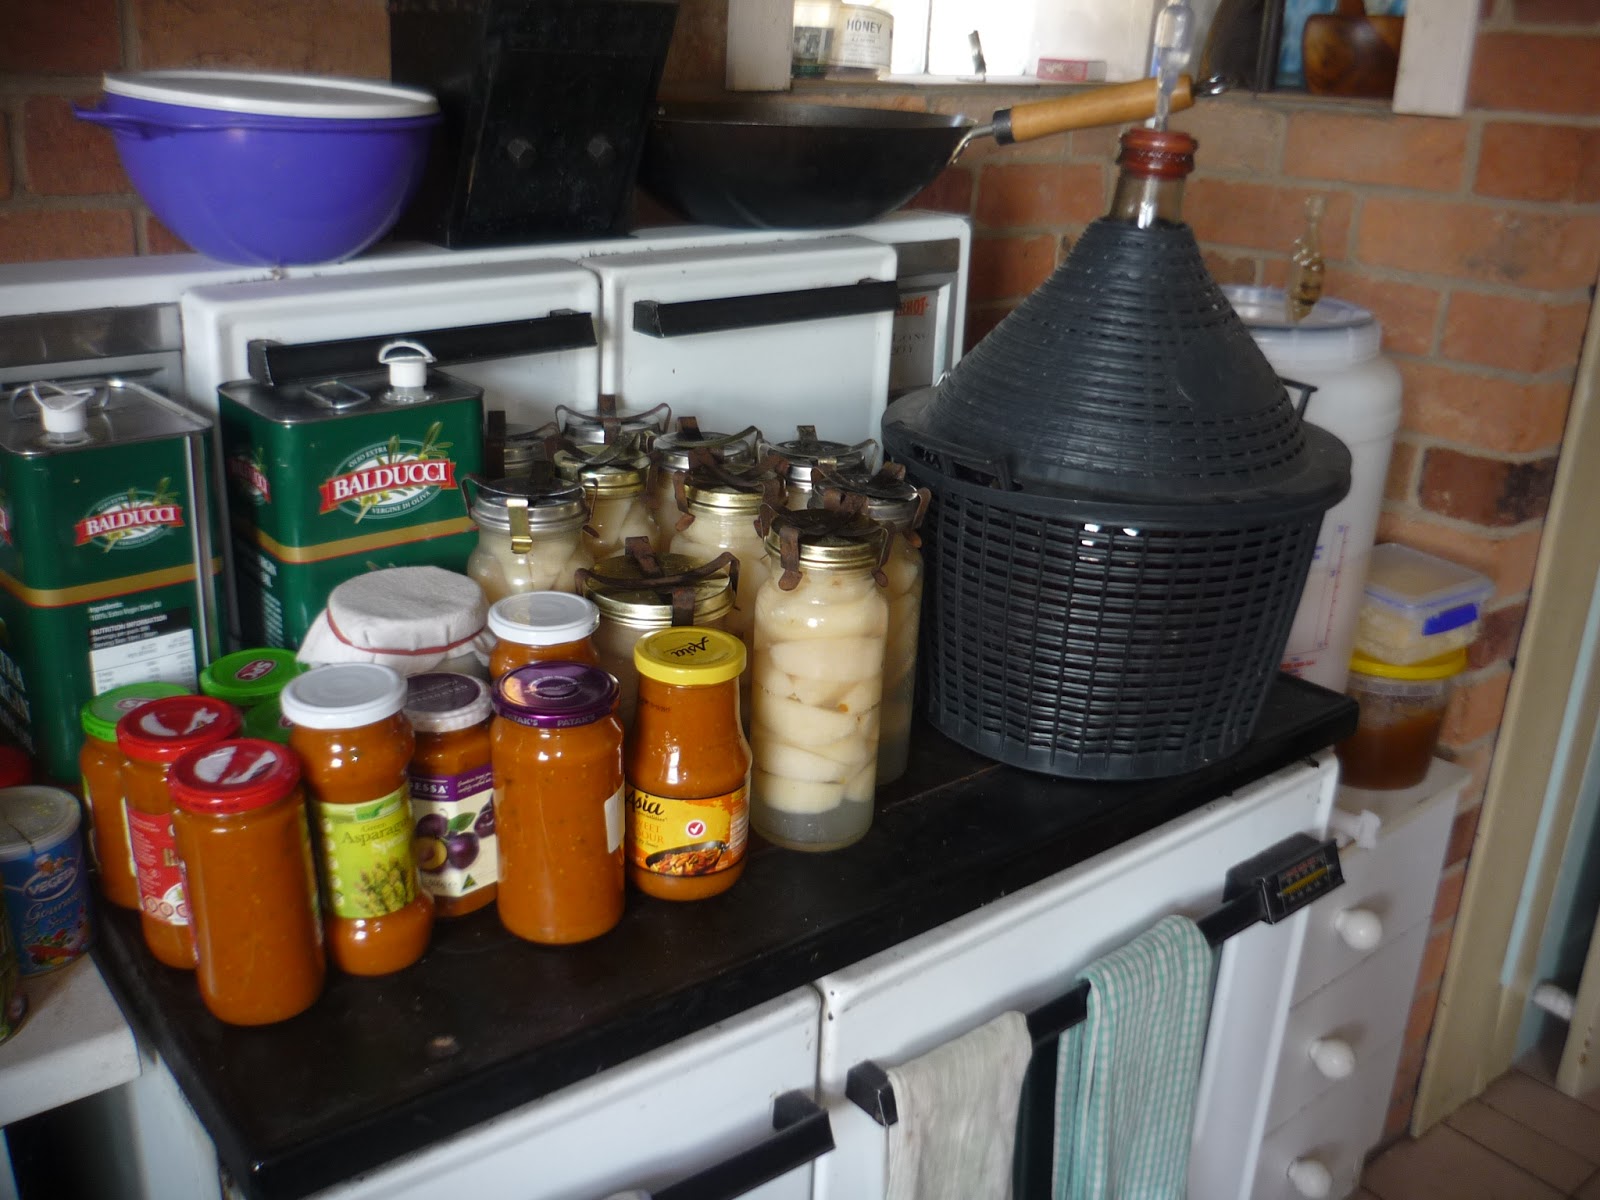
The nearest rhubarb was a little small for the hole so several sticks sufficed. It certainly looks fancy though the kids thought it looked like eyeballs! Eighteen jars later and I have run out jar rings so preserving will have to wait until I replenish. However I also made some more jars of tomato sauce, a jar of kefir, two bottles of kombucha, and a loaf of bread. The photo below shows some of the jars and bottles next to the merlot wine and the barrel of cider. It's a fine life.
 

Monday, April 11, 2016

Harvesting the Potatoes

 
Last year we grew enough potatoes to last our large family for about ten months. This year I was hoping to make it the full year. We planted in two patches - each on one of our two properties. One had a warm climate and regular watering, the other more fertile soil but colder and more sporadically watered. Both seemed to go well but that in a warmer climate seemed to die off much earlier.  
 
 
Four ten litre ice cream containers came out of the patch. There was one section still to be dug as there is a pumpkin growing on the top. It was still a good haul and will be packed away in the dark hanging shed in Styrofoam boxes filled with layers of sawdust. The really small ones will head to the pigs rather than be left to sprout again.

 
This year's patch ready for raking, manuring and preparing for the garlic crop to go in before Anzac Day.

How to Measure the Weight of a Pig

Our three piglets are getting pretty big. The fallen and excess fruit is beginning to diminish. This means that it is time to plan turning pig into pork.
The ideal weight is about 70kg for a porker. This would mean over 200kg of pig and that translates to a whole lot of pork. So measuring them is important to be able to work out when they have their one bad day.
I imagine that there may be scales that could be used and also that experienced pig growers can tell just by looking but I rely on a length of plastic tape. This is used to measure the girth (the width of the pig measured behind their front legs). A table on the reverse of the tape then converts the girth into estimated weight.
 
 
The pigs are very friendly and curious and will come right up to me if I enter their pen. These three are still a little wary and haven't yet taken to nibbling my trousers. So to distract them I pour some food into their trough and quickly pass the tape under their belly. When I pull it up to mark their girth they move away quickly but I have enough time to take a measurement of 85cm. When all three pigs come out with a similar girth I know I must be close. Using the table this translates to between 52 and 55kg. Not quite big enough but with enough food put in front of them they should be close to 70 in about three weeks.
We will have to clear some more space in the freezers!


Tuesday, April 5, 2016

Spoon carving and turning


"Made in the Woods" is a biannual event where traditional skills are taught and practised in a bush setting. I have attended three over the past few years and I find I am always drawn to spend lots of time with the spoon carver, Jeff. He is the one in the traditional terry towelling hat. He spends about half his time earning money from teaching spoon carving workshops in Australia and this year will be presenting at Spoonfest in England. Check him out at www.spoonsmith.com.au.
Anyway, the basic skill is to split a log into about four or more sections. This is shaped roughly with a very sharp axe or tomahawk. Finer cutting is done either with a draw knife on a shaving horse or pony or a sharp hand knife. I love the shaving horse so I tend to hog that for making my spoons. The horse is the device to the right where the guy is seated. His feet are pushing a slide that grips the wood near his hands so he can shape it by drawing the two handed draw knife towards him. For protection from these sharp tools he is wearing a leather apron.
 
 
The final part of making the spoon is to use a hook knife (one with a specially made curved blade) the helps to gouge the concave bowl of the spoon from the wood. This gives you blisters but makes the spoon come to life.
 
Another traditional tool used by Jeff is the pole lathe. Following my first time at "Made in the Woods" I returned to Opportunity Farm so fired up with enthusiasm I constructed my own shaving horse and a pole lathe. I haven't made much time to use it since so on this workshop I was determined to have a go.


The lathe is powered by your foot that pushes down on a pedal and turns the wood which is pulled back up traditionally by a springy pole (hence the name) or in a more modern way, an elastic cord. The trick is to scrape the turning branch with a sharp tool on the downward push and then ease on while it is turned back by being pulled upwards.  Here I made a ring by cutting in from both sides until the ring came clear but was trapped by wider wood on each side.

 
This is the wood after being removed from the lathe. The bolus has been sawn off above the shaft ready for gouging out with the hook knive. The ring is purely decorative but it was a good exercise in using the lathe. Since my return to Opportunity Farm I have set up my lathe and have a turn whenever I make the time.

Making Bush Furniture

I spent an weekend with a bunch of amazing people all interested or skilled in traditional crafts. Set up in a clearing in the bush we five crafts: blacksmithing, weaving, spinning and dieing, spooncarving and bush furniture making. I spent time with most of these but this post focuses on the construction of bush furniture.
 
 
This is the start of a rustic bench seat. First a slab was hewn with a hand saw from a dry log. then four short legs were cut and the ends shaped with a draw knife to the same diameter. Four holes were angled in the base with an auger. Each leg had a split cut in the shaped end and a wedge placed in the top of the split. When the legs were fitted and driven home the wedge caused the leg to grip tightly.
 
 
The bench now has its legs and two slots were augered into the top for the back of the seat. The slots were made with two auger holes side by side with the middle chiselled out.


This lady made a ladder out of green timber. The frame was made by splitting a straight length of branch in half. The ends of the rungs were all shaped on the shaving horse (below) to the diameter of the auger holes. Once these were fitted a peg was hand made to keep the ladder together.
 
 
A ladder rung being shaped on the shaving horse.


This guy made a stool. The seat was cut as a slab from a dry piece of hardwood. Three legs were shaped with the draw knife and slotted into holes augered all the way through the seat. Three other pieces of green wood were cut to keep the legs apart and rigid.

 
The legs were pushed up through the holes to sit proud of the seat. A slit was cut in each one and a wedge driven into to seat level. The slits had to be cut perpendicular to the edge of the seat or the corner could snap off.  Any part of the leg still above the seat level was cut off.

 
The completed stool.


Saturday, April 2, 2016

Ploughing with a Pig Tractor

We keep our three pigs - Target, Sir Oinkers and Bobo - in a twelve metre by six metre enclosure with an electric wire at nose height. Inside the pigs have a small house, some shade and an automatic waterer that gravity feeds from a tank attached to the well. Over a few weeks the pigs will plough up the patch the enclosure is on. When they are piglets it may take two months but when they are larger they can plough it up in a fortnight especially if it has been wet. The pigs have been in this area for just over two weeks are almost ready to be moved. 
 
 
This paddock has a sedge type grass that is not very palatable, even to the goats that live in it. The pig tractor is designed to slowly replace this grass with sweeter varieties, both by improving the fertility and by physically removing the grass. The photo below shows the next patch to be ploughed up.

 
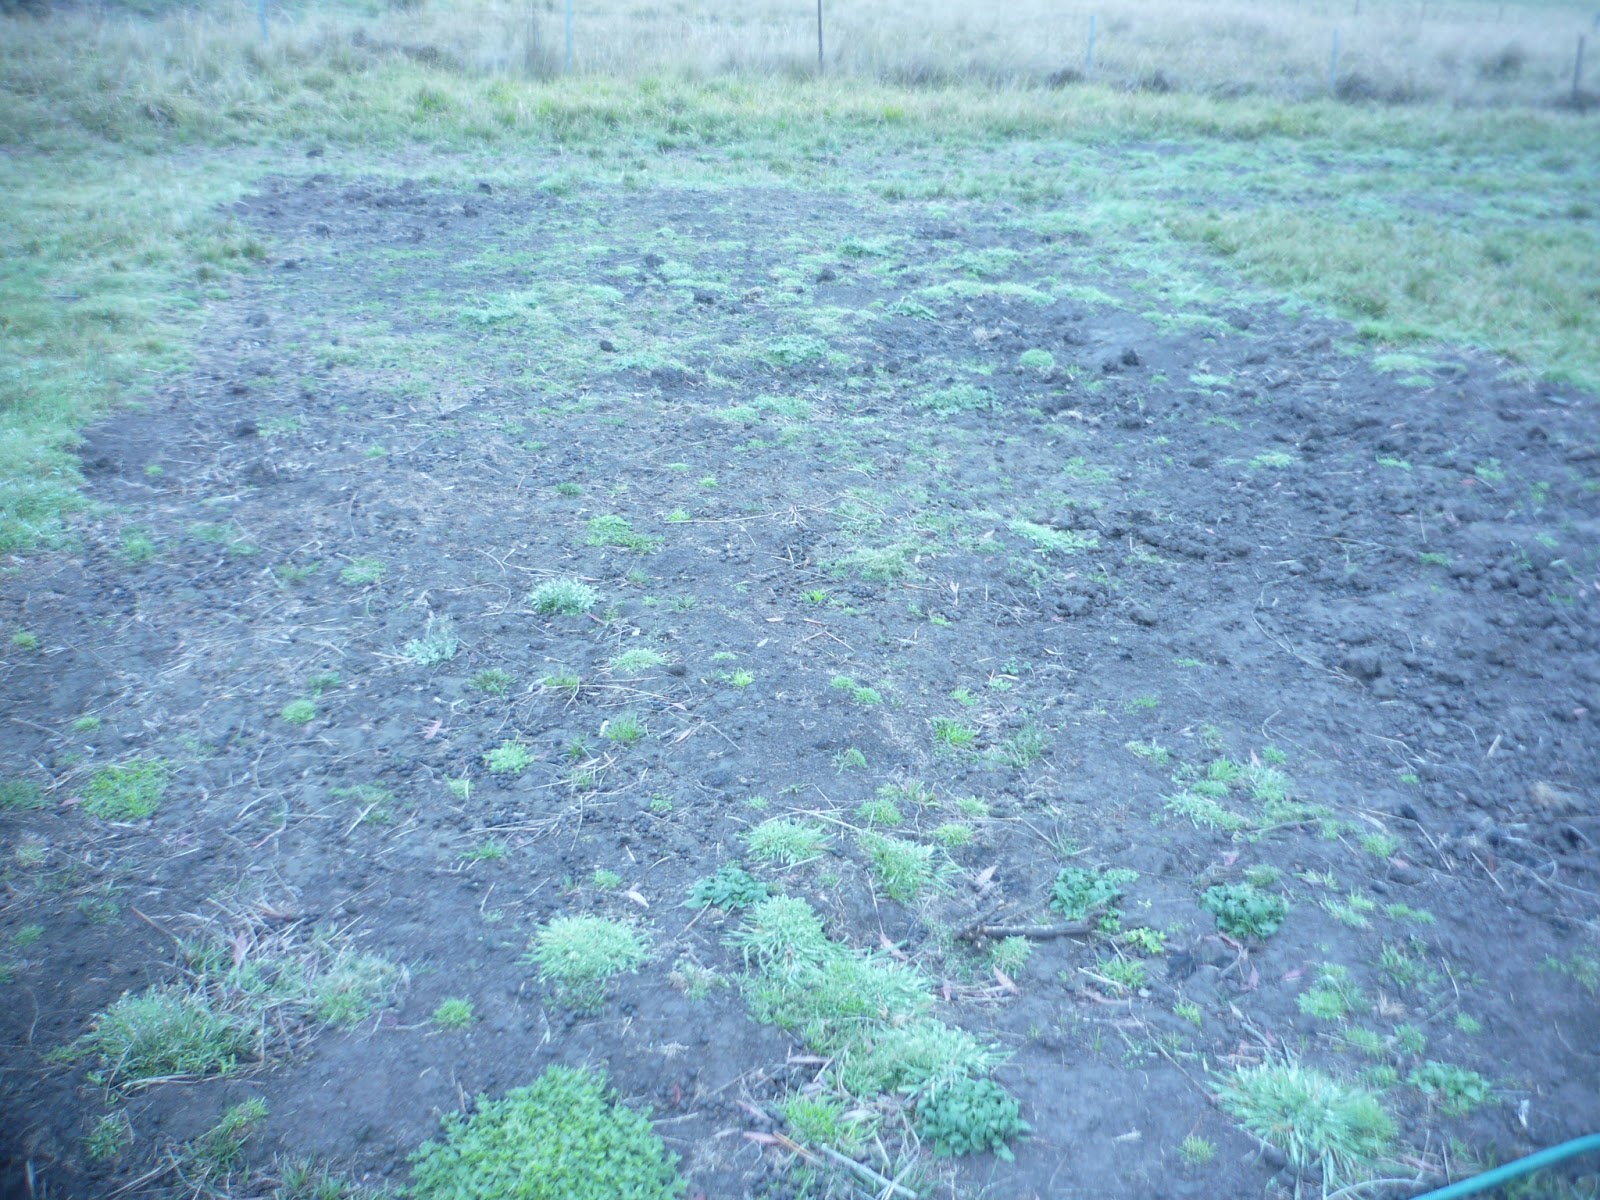
The patch below is the result of last year's pigs. We fatten them for about six months during summer and autumn when there is plenty of excess produce about. So it has been almost a year since the pigs were removed from this patch. The sedge has gone and the new grasses colonizing the area are much favoured by the goats. Often thistles will seed on the more compacted parts but the goats love them too. It is slow work to alter the vegetation one enclosure at a time but it works without the use of chemicals or tractor diesel.


Winemaking in Small Quantities

 
This year our four Merlot grape vines produced two tubs of grapes. Time to process.
 
First the grapes are washed and any extra leaves and twigs removed. The feet are washed too! About a sixth of a tub of grapes is put into a new tub and squashed underfoot. You get the feel after a while of whether there are any more grapes left unsquashed. It becomes more liquid as the juice flows out.

 
The result is juice and musk - the remainder of the grapes and stalks. The mixture is poured through a sieve so that the juice goes into the barrel and the musk can be discarded for more pig pleasure. It is a good idea for some musk to be added to the barrel as this will assist fermentation. This year our haul created fifteen litres of wine - Chateau Opportunity Farm 2016 vintage.
 
One year when this musk was removed at the bottling stage a small amount was consumed by one of our dogs, whose staggering antics appeared to suggest snakebite. A quick trip to the vet ensued, where he was put on a drip. When he threw up small round black balls the vet's assistant called us to ask what they were. Then realization dawned, the dog survived and we had a great story to tell of the drunken dog.


The musk ready for the pigs. Not being fermented yet it is safe to give them without the likelihood of staggering, slurring porkers!


Social Cider Making

Cider making is a good excuse to invite some friends over to share in the labour and the resulting produce. Kids love to help out and never seem to tire of the different jobs, especially loading the crusher.
 
 
Firstly the fruit is chopped in half and then place in small batches into the crusher - seen as a silver funnel next to the friend with the hat. Once the press is about two thirds full with apple pulp the crusher is removed.
 
 
The press is gently lowered onto the pulp which is contained in a piece of cloth. A round of timber split into two for ease of removal goes on top of the cloth and two sets of slats reduce the depth the press has to go before binding.

 
The handle is turned until it meets some resistance and then a lock is placed in the ratchet so the lever can be operated to move the press down one tooth at a time. The juice starts to flow into the jug at the bottom. When it stops flowing more pressure is added until it seems tight. Then the press is tilted to drain the remaining juice into the jug. The lock is then removed from the ratchet and the press wound back up. The cloth is removed and the pulp is put into a tub for pig pleasure later.


The press is over forty years old, since its importation from Switzerland. It works like a dream and six boxes of apples have been turned into twenty litres of juice. The juice will stay in the barrel until t has stopped fermenting and then it is bottled and ready for drinking.

Cider making day has been a very pleasant opportunity to spend time with friends, share a healthy lunch together and produce a drink to be savoured at intervals over the next year. It's a hard life, but I could get used to it.


Apple Harvest

March is time for apple harvest. While the Gravensteins have ripened from late January and don't keep till March, the other trees in the orchard are now laden and ready for picking. The Golden Delicious are beginning to glow yellow and the Jonathans to blush red. For the first couple of weeks I only pick the fallers and race the millipedes and the slugs. Any damage and the apples head to the pigs. Late March I pick most of the remaining fruit and prepare for cider making.
At this time I also keep an eye on the roadside trees nearby and grab a box whenever I have the time to stop. Roadside apples tend to be tarter and the mix seems to make for good scrumpy cider.

Thursday, March 17, 2016

Champion Collection of Vegetables

The 2016 local show was a chance to showcase our produce. Plates of apples, pears and berries were in the fruit section. Tomatoes of all colours and varieties, pumpkins, squashes, beets, onions, marrows and lots of others were in the vegetable section. Brown and white eggs and potatoes have their own parts of the Dairy section.
 

The most valuable award is the 'Champion Collection of Vegetables' - six distinct varieties, two of each. I entered capsicum, eggplant, tomatoes, potatoes, zucchini and squash. The advantage of gardening at a lower altitude than most entrants gave me the edge and the award was won.


This year I also won the 'Collection of Apples', the overall winner of the fruit and the vegetable sections and between three of the kids they won a junior section and the encouragement award.
One daughter won prize money in the Junior Cattle and Junior Grain competitions. Two came home with show girl sashes and two won events in the horse events. 
 
Plenty of smiles, prize money and an endorsement of the lifestyle of being homesteaders.  

Preparing for the Show

In 2015 I first entered the local show. This involved learning a whole new language and protocols of how to present and what is meant by terms such as 'Winter Squash'  or 'Dessert plums'. The kids entered large and unusual vegetables.
We came away with plenty of awards including 'Champion Vegetable Exhibit' and 'Most Prolific Vegetable Exhibitor'. It was very gratifying so this year we were more prepared.
 
 
A day was spent collecting the best looking fruit and vegetables.

 
The biggest pumpkins and marrows were labelled.

 
Other items such as jam and preserved peaches were prepared to enter other sections. Then two car loads of produce, art work and cooking was delivered to the Show hall. The weather was unseasonally hot so the butter icing melted and the silverbeet wilted in the tin-clad Hall.
All that was needed was the judging.
 

Autumn Processing

A friend gave us a bag of plums. We have heaps of apples. Time for some preserving.
  1. The plums were washed and the stones removed.
  2. The apples were peeled and cored.
  3. These were put into a large pot with a small amount of water and a couple of tablespoons of sugar.
  4. Once the fruit was soft a stick processor was used to mush the fruit up.
  5. The mixture was poured into Vacola jars and lids fitted.
  6. The bottles were slowly heated up to 85 degrees Celsius (180 F) taking 45 mins to reach it.
  7. This temperature was maintained for one hour.
  8. Once cool the bottles were removed from the water and placed in a cool place.
  9. One winter night we get to eat some tasty fruit.

Tuesday, March 8, 2016

Roadside Haul


A hour to spare while my daughter is doing her dance lessons. Three roadside trees about five kms out of town laden with fruit. Three empty boxes waiting for a purpose. A recipe for a productive haul of apples.
There were plenty of damaged and partially eaten apples on the ground where the parrots and cockatoos had dropped them but the fruit on the trees that was within reach was plenty. The first tree had plenty of marks on the skins, maybe a product of weather damage or blemishes in the growing period. The second tree had bigger fruit and was probably a Golden Delicious. The third was the most productive and the fruit was so ripe and unmarked that fussy children who usually object to 'homegrown' fruit eagerly ask for them to go in their lunchbox.
We have found that roadside apples make for good cider. This haul will form the base for this year's brew.

Thursday, February 18, 2016

Reflection on Comet's Last Day

I watched Comet the Jersey/Dexter calf being born sixteen months ago. For the past fifteen of those I have let her in to her mother Hailey each  morning after milking and escorted her out with a shout of "Hup" in the late afternoon. I have watched her grow from a bundle of legs trying to stand within minutes of birth, to a heifer about three-quarters the size of her mother.

I loved the idea of having a second cow so that we had no period of time without milk and that the two mothers could keep each other company. Rationally, we don't have enough grass for two cows, especially through winter and if they both have calves. Realistically we get enough milk from Hailey for our domestic needs and the milking process already takes enough of my day.

So Comet had to become a welcome freezer filler. The cost of feeding and growing a milking cow makes the price of the milk produced about the same as buying the second cheapest brand in the supermarket.   The real financial benefit in having a house cow comes in the cost of the meat from the calf grown with a share of that milk.

Loading Comet onto the stock crate was easy. She is trained like her mother to follow the red bucket and has a taste for the beef nuts it contains. It was the movement of the trailer on the windy and corrugated road that must have been very stressful for an animal that had never been more than 400m from where it was born. 105 kilometres of bends and bumps to the nearest abattoir was a long way to be of unsure footing.

The abattoir was clean and well organized but the mental understanding of what is done there and what it means to an animal you know so well was hard. My 27 years of vegetarianism was given up by an understanding that eating meat you've met - that has had as good a life as possible - is better than eating alternatives created far away with unknown practices. The actual slaughter part is still stressful.

Comet was quietly encouraged into a holding pen and I left. I will enjoy the bounty that she will provide not just because of the taste of healthy organic beef, but because Comet was special, our first calf. It is a necessary part of producing your own food that some life has to end.

Sorting, Tagging and Drenching the Sheep

 
Of all the animals on Opportunity Farm the flock of Wiltshire Horn sheep are the easiest to manage. They stay in their fences, they breed and birth easily, don't require shearing or crutching and come when they are called. Much of the time they are out of sight feeding themselves. In Winter they are supplemented with some Lucerne and sheep nuts and we keep an close eye for rejected lambs in Spring. However they do need regular drenching, especially to combat the impact of worms. So about every three months or when we see them looking unhealthy they need to be brought into the yards.
 
At this time of year we separate them into two groups. The ewes we want to breed off are put in with the ram while the coloured sheep are put in with last year's ewe lambs and wethers.
Our neighbour with whom we share the sheep brings his experience to help us with the drenching. Michelle filled the syringes and passed them to him to wrestle open the sheep's mouths and squirt in the drench while I moved the sheep up and wedged them tight against the race wall.
We also decided to tag them all with our Opp. Farm orange ear tags so that they are easily recognizable and that if we remove any from the property that they have the farm identifier number on them which is now a requirement for all livestock. The protocol is to clip the tag into the sheep's right ear for a female and the left for a male. This certainly saves lifting them up when they are in the race just to identify their gender.
 
Now the ram is happy and has a flock of ewes to protect and inseminate and the wethers can be fattened up for the freezer. 


Some of the Wiltshire Horn ewes awaiting drench and tagging with Harriet, the coloured Merino, in the foreground.

Bottling the Peaches

 
The peaches are ripe and will spoil quickly if they are not processed. A few of these were fallers but the chickens under the trees soon clear up the bounty so I had to pick the rest. I reach up to the stem and press very carefully to ascertain if the peach is ripe. Even this action will leave an indent that will turn into a bruise in less than a day. If the peach trees were at the same location as the processing then I would make sure that each peach was kept away from being touched and pressed upon by anything until I was ready to deal with it. However as I have to drive the peaches 38km on a corrugated dirt road and have limited space in the car they have to be placed in as wide a box as possible to reduce the weight of the upper peaches on the lower ones. Nonetheless they bruise.
 
 
Some of the nearly 200 peaches needing to be bottled.

 
I have two Vacola sterilisers and one special thermometer. Even on a conventional stove top it is possible to use both and sterilize up to 16 bottles at the same time.

 
I set up clean bottles, a sharp knife, peeler, a chopping board and two scrap buckets - one for peach stones and one for all the skins and an damaged flesh.

 
The bottle lids and rings are sat in hot water for a least 15 minutes before using. I reuse both but cull any ratty looking rings or lids that have been prised open in a way that leaves a dent.

 
 In advance I have prepared some sugar syrup. For this batch I put 2kg of sugar to 5 litres of water. However this was too heavy which meant the fruit rose in the jars. For later batches I will use 1 1/2 kg for 5 litres. That amount will fill up to 20 no.31 bottles. I prefer these ones (which use a size 4 ring and lid) because I can fit my hand in easily to arrange the fruit. 

 
I peel the skin off the flesh. If the peach is ripe enough this can be done by hand but a peeler can do the job well if needed. The peach halves are cut into segments which are arranged in layers with the curve of the peach matching the curve of the bottle. After a couple of layer a segment is pushed into the hole in the middle and then some sugar syrup is poured in. This assists with avoiding fruit spoilage and reduces the amount of air bubbles caught on the sides. If there is air trapped I release it by sliding a sharp knife down the side. When the fruit and syrup reaches the top the lid is placed on and held firmly in place with two clips. The bottles are placed in the Vacola unit and water added until it almost comes out of the thermometer hole.    
The water needs to be brought up to 180F (83C) slowly - at least 45 minutes and then kept at that temperature for at least 60 minutes.
If I have another batch of bottles ready I carefully remove the  sterilized bottles and half of the water, put the new bottles in and top up the water with cold.
After a day I remove one clip and after two I transfer the bottles to the shed. It is best to keep them in the dark. Those bottles where the syrup was too 'heavy' and the fruit has risen I will turn upside down after about two weeks and shake gently to encourage the syrup to move between the segments of fruit. Bottle peaches will potentially keep forever but will start to use their vitality and nutrients after about a year.