Wednesday, September 30, 2015

Growing Mushrooms in the Pantry

 
I love mushrooms and most of my little cherubs do to. The offerings in the local supermarket tend to be at the end of their cycle and turn dried out and withered before you can top a pizza. So I was delighted when Michelle came back from a hardware store with a mushroom kit.
It seemed simple enough to mix the two packets together and put in a cool dark place for a while. The instructions stated that the compost needed to be kept moist. It is hard to know exactly how much water to apply but I give it a squirt with the same bottle I moisten the seedlings. Fitting it into a routine helps make sure I don't forget the box in the darkest corner of the pantry. Clean dishes... wipe surfaces...water seedlings... squirt the mushrooms.
For about five weeks nothing much happened. Then a little ball appeared which grew into a tasty mushroom. Since then sporadic burst of fungus have appeared and been devoured. Long may it last. 
 

Tuesday, September 29, 2015

Fermenting in the Kitchen

 
Today there was lots of activity in the kitchen. Michelle was preparing 12kg of different sauces for a scout camp on the weekend but there was also a lot of fermentation going on.
 
The kombucha tea needed bottling and a fresh batch prepared to feed the scobies. The shredded cabbage needed to be put into jars for sauerkraut. The kefir needed making with more raw milk and the sourdough culture provided the basis for a loaf of bread. The currant wine just felt like being in the photograph on the ground that it was fermented before being bottled back in January.
 
More about how to actually make these products in later blogs.


from l-r: Kombucha tea with  floating scoby, 2015 vintage currant wine, sauerkraut jar, kefir bottle - sourdough in covered bowl. 

Looking after freshly hatched chicks


Once the chicks hatched they flopped about in the incubator all sticky from the inside of the egg. I left them there for a couple of hours until they began to dry out. Then they were transferred to a brooder box. Mine is made from an old deep drawer with the back panel missing. I put a tray inside the drawer which I filled with sawdust from the workshop. This makes it easier to clean out and change the sawdust.
The side of the drawer that is missing is placed against the shed window so my little kids can watch the chicks grow without having to open a stiff shed door.


The chicks need a heat source. I purchased a 75W heat lamp on eBay for about $20 which comes with a stand that allows the bulb to be raised as the chicks grow (otherwise they get singed heads!).
They have a feeder that allows them to get their heads in to feed but not to stand in. They still like to perch on the wires and poo into their feed, though. I use commercial chick starter feed from the local farm store - in our case, Landmark. Each day I add feed and sometimes clean the feeder so that the poo is removed.
The water feeder is an inverted plastic lemonade bottle screwed into a trough that allows chicks to drink but not to drown. Apparently they can find all sorts of ways of committing suicide if you are not careful. I place the trough up above the sawdust so that the water is at beak height and the sawdust does not clog the water.
As long as the power does not go off and they have plenty of food and water they have all they need. I check them once a day mainly to marvel at how much they are growing - the ones in the picture are eleven days old. One is developing a tail and they are all getting the black and white wing feathers of the Light Sussex breed.
These chicks will spend about three weeks in this brooder box as hopefully the batch will be hatching and need the space. After about ten days they are active enough to need a net over the top to prevent the chicks hopping out as they test their little wings.

Monday, September 28, 2015

Summer brassicas


For some years I tried planting broccoli and cauliflowers in summer. Each year they were a magnet for the moths and ended up an inedible scrawny collection of veins and sticks. It just wasn't worth the space in the garden.
Last year I decided to have another try and this time put a cage over the bed covered in bird netting. Some varieties of moths were still able to enter and one managed to lay a lot of eggs which became caterpillars but the cabbage whites stayed out and the caterpillars didn't seem to eat much. They were easy to wash out!
The plants were put in a little late in the season so the pak choi grew fast and went to seed. The broccoli and cauliflowers were great - particularly the broccoli as the more that was picked the more that grew to replace it. The caulis were fine but were a one-hit wonder.
This year I decided to get the plants in the ground early. The net needed a bit of darning and the cage design was improved with some more wood around the base. After weeding plenty of horse manure was mixed in and lime added and it was ready for planting. Once planted with seedlings it was mulched with partly rotted Lucerne suffused with droppings from the guinea pig cage.

A small green sprouting broccoli seedling

The self seeded pak choi (thinned from several hundred) inside the new improved brassica cage.
Hopefully the rabbits stay and moths stay out and the harvest is great.

Snow

Just when it seemed that Spring had arrived and the firewood pile no longer needed replenishing we woke up to silence. When there is a snowfall the birds and frogs are quiet and the snow deadens any sound and reduces any likelihood of distant traffic sounds. It was a still morning so the snow settled on thin surfaces without being blown off.
 
The not so hot house

Even thin branches kept snow cover

The old boiler looking iced

The shed I would have been working on.

The potatoes that were planted the day before
 
It melted pretty quickly and was all gone by afternoon but lo and behold the next morning there was another dump!
 

Tuesday, September 22, 2015

Planting out Potatoes

After four glorious days of warm springshine today it snowed. Then it sleeted. Then the sun shone for a few seconds. Then it rained and then the cycle started again. Occasional hailstones were the only variation to the damp and cold.
With the prospect of several days of this weather there was nothing else for it but to head out in the breaks and the rain and dash back into the shed when the snow, sleet or hail started.
In this way the potato planting was accomplished.
First a trench was dug along one side of the bed. It was about a spade's depth and the soil removed was carefully placed on the side closest to the centre of the bed.

 
The next trench was dug parallel to the first trench and about 40cm away. A third trench went alongside in the same way.
Some well rotted goat manure was scattered in the bottom of each trench. Any larger lumps were broken up.
Then the seed potatoes were placed into the manure at about 40cm spacings. The varieties used are King Edward, Dutch Cream and Bintje - all larger all rounders. A thin layer of soil was knocked off the top of the heaps to cover the seed potatoes and the manure.

 
Finally the whole bed was covered with mulch - a bale of Lucerne hay.
As the potatoes grow the heaps will be pushed into the trench and then dug down so the trenches are beside the heaped up potatoes. As long as there are not too severe a late frost there should be plenty of potatoes to harvest next year.  


Friday, September 18, 2015

How to hatch out a small number of chicks in your kitchen.

This is how I incubate chickens. It may not be the best way but so far it has worked for me.
A couple of years ago we bought a cheap incubator on ebay. It has a thermostat and automatic egg turning - which are pretty vital if you don't want to be a complete slave to your eggs. The one we have will hold up to nine eggs.

When collecting the eggs to be incubated make sure they are clean - only use a damp cloth to wipe them if they are dirty.  Washed eggs will require more humidity so the ideal is to pick only clean ones. Keep them pointy end down in a cool place - like a pantry not a refrigerator! Rotate them daily. They will be fine to keep for up to 10 days before incubating, but the success rate will start to diminish after a week. Don't write on the eggs.

The incubator needs to be scrupulously cleaned before use and turned on a day before setting the eggs. The eggs should be placed either on their sides or pointy end down so that the oxygen in the air cell in the non-pointy end is accessible to the growing chick.

Our incubator needs about 100ml of water in the base to give the appropriate humidity and the thermostat is set at 37.5 degrees Celsius. It should be placed in a spot where there is little likelihood of temperature extremes or draughts. Ours is set up in a corner of the kitchen where it won't be forgotten and the kids can watch the eggs hatch while eating their dinner.

As long as the water level is maintained there is little to do for the first seventeen days. Beware of power cuts but the eggs will hatch if the temperature drops for a few hours. A shorting vaporiser left our latest batch in the cold for four hours - but eggs still hatched.

On the seventeenth day the humidity needs to rise so I add up to 200ml of water to the base of the incubator. I also take out the egg roller and the top shelf so that when the chicks hatch they find walking easier.
A chick breaking the shell with its special claw tooth.

Once the eggs start to hatch I leave the chicks in for a few hours to dry and fluff out before transferring them to our homemade brooder box. Some chicks find it hard to walk at first but most will come good after a day or so.

Monday, September 14, 2015

Getting the Garden Ready

 
Some projects take a while. This gives plenty of opportunity to make sure that the idea is a good one and that it is needed. Two years ago the water pipe was dug in for a central tap. Last year the poles and rails for a hothouse went in. The garden grew tomatoes and basil, rocket, silverbeet, parsley, onions and plenty of weeds. Over winter the weeds have taken over and it is time to clear it out and set up some pathways. This needs to be done before any covering can be attached.
 
 
Once the weeds are gone and the beds established then the manure and compost can be mixed in and mulch applied. If all goes well it should be a more productive garden and one that is much easier to maintain and keep the weeds at bay.
The days are getting warmer and the grass (and weeds) are beginning to take off. It's time for action and for planting. The tomato seedlings have germinated and the first pumpkin is raising its head. Spring is well and truly here.


Tuesday, September 1, 2015

Spring is here


The official end to the wet and cold winter has finally arrived. The grass has started to show a green tinge and the lawn will soon need mowing. It seems to have been a particularly grey winter with too great a prevalence of mud, sleet and cold wind. We had two significant snowfalls and plenty of flurries and flutters. Too many days when being outside was a challenge rather than a joy.
Five kids arrived with one doe yet to kid.
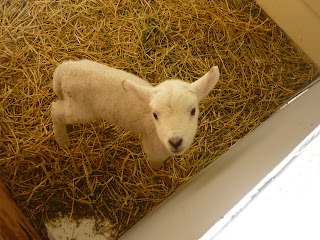
In autumn we chose ten Wiltshire Horn ewes to join our two young rams and from these we had thirteen lambs. Four ewes had twins but only one has persisted in raising both. Two died and one we rescued from a cold night calling out for its mother with weakening cries.
This female lamb was lucky that it received some of the colostrum from its mother that is so vital in the first few hours after birth. Lily, as she was named once she had survived three days, is a poddy lamb. Three times a day she guzzles down her milk so fast and hard that it can make her noise bleed banging on the lid of the bottle. She has an enclosure on the front verandah, one on the grass of the front lawn and a large cardboard box placed in front of the fire or for when she travels in the car - if she needs a feed while we are away somewhere she has to come too. A farmer gave us another abandoned lamb but it didn't make it through its first night which was sad but not unexpected.
 
The cycle of the farming year seems to start with seeds. We try to get our summer garden seeds into seed trays in the last week of winter. The seed raising mix  is the only other ingredient.
Here Michelle is using the seed dispenser to place seeds in a tray.
 
 
Once all the seeds are sown, covered and labelled the trays are put up on specially constructed shelves which go across the kitchen windows. They receive plenty of warmth and light and being so central are remembered enough to be given water.