Tuesday, December 29, 2015

New Blood

 
At Opportunity Farm we keep goats. They are an eclectic mix of dairy and meat breeds. A smattering of Saanen, a dash of Toggenburg, some Australian Brown and decent dose of Boer. The chief buck was, until this winter, a diminutive but easy going Boer called Cedric. He happily wooed his girls with the usual goat etiquette of curled back lips and peeing on himself. He fathered several generations on our farm and even attracted other people to drop off their does for his servicing.
This winter Cedric failed to do the deed with one such doe. We started to worry and soon enough Cedric was staying in the shed longer and sitting down more regularly. By the time the vet was called he was in the final stages of cancer and succumbed despite the best efforts of the local James Herriott.
 
So that only left Curly, our mongrel dairy buck. He is closely related to many of our does so is less 'useful' as a prospective parent. So we needed some new blood. A conversation with a new friend revealed they had a paddock full of little Boers and hadn't yet used the emasculator to render them infertile.
Can they keep one for us? Of course. For a very small fee we have a new Boer buck. We think of Dutch names such as Johann, Pieter and Meindert. Hans seems more appropriate and can even be elongated to Hans-some.
So if he can survive Curly and pack on some pounds then next year he might start fathering some more meat goats.
 

The Tools for the Forge

Christmas is over and the present wrappings are in the bin. My special present didn't come down the chimney or on a magic sleigh. It arrived on the back of a trailer.
One very old and exceedingly heavy anvil and a homemade forge - the best sort of second-hand goods. Having spent a weekend at Mother Mountain Forge at Dignam's Creek I am keen to have a go myself.
Stage One - gather the tools.
Stage Two - construct a lean-to as a forging place.
Stage Three - collect or make charcoal.
Stage Four - Fire her up and see what happens.
 
So the first step to making metal bend is completed and plans are afoot for the second one.


Monday, December 7, 2015

Late Frost - A Tale of Two Gardens


 November 28th - Two days until summer. Rising to milk the cow a little after six am I am greeted by a white tinge on the grass. I check the garden and all the plants are coated in a thick layer of frost. As the sun is reaching over the mountain I am pouring water on the tomatoes, basils, pumpkins and zucchinis. The convenient hose is no use as the water inside has frozen so it is lots of trips to the tap with the watering can. Too little too late. Within hours the leaves were withering and turning black.
The potatoes didn't look too happy but enough lower leaves survived. The grapes were hit and even the lavender was knocked back.
November 30th - 34 degrees!
December 2 - Woke to a snowstorm that lasted for an hour!

 
Frosted Potatoes
 
 
A very sorry looking zucchini
 
 
So the summer garden at Opportunity Farm is almost back to square one. Start again with more plants and even less chance of a decent harvest before we hit the next frost.
 
 
Luckily we have a back up. Our other garden is 600m lower in altitude. We have enthusiastic garden tenants to water and weed the plants and it is bursting with growth. The first tomatoes are close to reddening and we have already too many zucchinis.  


A raised bed with tomatoes, egg plant and capsicum.


Zucchinis galore just waiting for our piglets  

Tuesday, November 24, 2015

Genetic Diversity

 
Breeding animal 'bitsers' is always interesting and turns up lots of different shades and shapes.
 
 
This newborn buck is a very dark colour. His mother, Princess, has a Toggenburg mother and a Boer father. His father has a Saanen mother and an Australian Brown father. So far it is hard to tell who he takes after.

 
I have twelve Sussex chicks that I have incubating this Spring. Their three possible mothers are pure Light Sussex while of their three possible fathers one of them looks like a Light Sussex but has some genetic diversity which is shown by his orange legs rather than the pure bred grey legs.
Two of the dozen are brown not white, perhaps Buff Sussex. One other has a brown tinge. I am unsure whether these differences are made through interbreeding eg Sussex plus Isa Brown or through a genetic variation eg Buff Sussex.

 
This baby guinea pig has two brown parents (as shown in photo) but has come out mottled with a range of colours. In the last litter there was one black and white baby. Despite the danger of inbreeding with guinea pigs they do seem to throwback plenty of variation. 

Strawberries that the birds won't eat!


This year we have almost a whole bed of alpine strawberries.
 
 
These have lusher, greener leaves and a fruit that ripens white. They are smaller than most strawberries but just as delicious. The main benefit is that they do not attract birds, insects and even dogs that all love to guzzle on the red ones.


Definitely worth a try if you have a problem with garden pests. I have had a few of these plant for a while but this year they have really taken over so they obviously must propagate well.


Friday, November 6, 2015

Comet the Calf is Turning One.

A year ago I was lucky enough to check on Hailey, our Jersey cow, just as she gave birth to her first calf. She had been bred with a young Dexter bull so the calf was small enough for her diminutive frame. I sat with her for a while and watched all those milestone moments of standing up and latching on. It was a special moment and one of the highlights of having animals here on Opportunity Farm. We named her Comet - Hailey's Comet!

 
After three weeks I started to milk Hailey and since then we have been sharing her milk with Comet. Every morning she is let in after milking and she spends the day with her mother. In the evening when Hailey is called in for her feed, Comet is locked out. Most of the time she heads for the gate when she hears the call "Hup" but there have been a few occasions when she has needed a bit of chasing out.


She still loves her mother's milk and runs in for any leftovers after I have finished. Hailey is not only providing us with more than enough fresh milk for a family of seven but is helping to grow her calf. We don't have enough grass in winter for two cows with calves afoot so when Hailey is rested before her next calf we will send Comet off for her one bad day and fill the freezer with plenty of homegrown beef.

Tuesday, November 3, 2015

How to Make a Delicious Citrus Cordial

 
Spring may not be the season for most fruit to be harvested but there's often plenty of citrus needing to be picked. Having grabbed a bag of assorted lemons and oranges from our warmer bush block it was time to make some cordial. 
 
The ingredients:
24 citrus fruits
 6kg of sugar
4 tablespoons of citric acid.
16 cups of boiling water not shown!

Method:
The zest is roughly grated off the citrus and put in with the water and the citric acid.
The water is brought to the boil then all the sugar is stirred in until dissolved.
 
 
The juice is added and stirred in.

 
The mixture is left to cool; best overnight.

 
Recycled wine bottles are washed and then sterilised in the oven for about 20 minutes.

 
While the bottles are still warm, the mixture is strained through a sieve into a jug and then poured into the bottles. Sealed up, these bottles will last for a long time in the pantry. Once opened they need to be refrigerated to avoid some moulding on top.
 
Serve with water to taste and plenty of ice on a hot day. 

Wednesday, October 28, 2015

Free Range Guinea Pigs

Once you have a mixed pair of guinea pigs you no longer have just a pair. So this is what we are doing to make them useful and not productive. We have kept the main breeding pair and separated out the other males and females.
The males are released into a caged section of the orchard that contains the grapevines. Corrugated iron has been dug in all around the base of the cage so that the guinea pigs have a hard job to escape. Here they can eat the greenery that grows under the vines but will not eat the grapes (as the chickens used to do). Their numbers are stable as they are all male. The tunnels between the clumps of grass are cool and secluded so they should be able to survive hot weather. The only need for human intervention is to keep up the water supply.

The Guinea Pig house in the orchard.

Guinea pigs are among the only animals that cannot regulate their body temperature through making their own Vitamin C. This means that they are prone to death in heat or cold. However our guinea pigs seem to adapted very well to the challenges of cold. All survived outside last winter with only each other and some straw to keep them warm. It snowed three times but they were fine. It slows the reproduction down, though!

Sunday, October 25, 2015

Home Butchering

Three days ago three fat lambs were dispatched and skinned. While their carcasses hung in the cool room the skins have been left to soak in lime to start the leather-making process.
Today was set for the butchering. The table was cleaned, the tools found and wiped, the buckets filled with hot water and the bags readied. The spare freezer was turned on. The initial freezing will take place in this spare one so that the bags do not freeze together and so it is easier to sort once frozen.
The butchering is done by our neighbour and the meat shared. My role was to be gopher and packer.
 
The prepared tools

 The first job was to cut the carcass in half with a sharp handsaw. Then one half at a time is brought to the shed to be chopped. The cool room is insulated and clad with tin. The temperature is reduced with an air conditioner set to about 6-10 degrees. This is sufficient to allow the carcass to hang for long enough to taste good.
 
These lambs have been in a very lush paddock and have a decent layer of fat.
 
 
The leg and shoulder are cut off each side which is then cut into two with a saw. A sharp knife and cleaver separate the chops and ribs while the fat and more gristly parts are cut for the dogs and the chickens.
Two hours work and three families have plenty of fresh lamb to eat and the shed is cleaned up. At $15 a kilo for organic lamb it is a very cost effective way of producing food as well as representing zero food miles as the lambs were born and raised within a stone's throw of where they will be eaten.
 

Wednesday, October 21, 2015

Getting the Orchard Ready for Summer

 
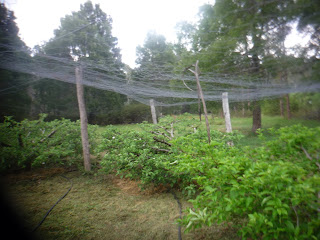
The 'bottom' orchard yielded no fruit for seven years. The parrots took it all. So we caged it and since then the harvests have been more bountiful. The main problem is keeping the trees low which takes some hard pruning but these apples are getting a fine vase shape and yield heavily.
Over winter the trees have been pruned and the cuttings removed. The blossom has come and gone and the fruits are forming.  


To be ready for summer the grass has to whipper-snippered as low as possible. I try to keep the grass away from the trunks of the trees so once it has been cut, the trees are mulched with Lucerne hay. If I run out then I use the grass clippings.
 

The orchard is watered using an on-ground sprinkler system. This delivers water to the drip lines of the trees with three sprinklers per tree. Having the pipe on the ground leads to a number of problems - the grass grows over the pipe, the mower has restrictions on where it can cut without severing the pipe and the sprayer fittings get cut off by the whirling snipper string.
So each spring the pipe needs to be pulled up from the grass so it can be seen and the sprayers checked and replaced if they are damaged.
As this orchard is at the lowest point of the property, water can be gravity fed from the dam. A timer is set on the tap to make sure it turns off. Once mowed, mulched and the water pipe checked then the trees are ready  - only occasional summer pruning and mowing needed. Three overcast hours and the job was done.
 
Plumcot fruit forming


Saturday, October 17, 2015

How to Sex Sussex Chickens


When you incubate your own eggs not only can you not count your chickens before they're hatched but you can't predict how many will be hens and how many will be roosters.
Last year I just had six and for a long time I optimistically thought I had five hens and a rooster. Wishful thinking and ignorance on my part. I actually had three of each. Now that I know how to tell the difference (without waiting till they lay eggs or crow) I am interested to see how young it is possible to tell.
These chicks are one week old. Four are yellow and three are lighter with a black stripe on their heads. The black and white wing feathers are the first to develop.
 
These chicks are four weeks old. The wing feathers are mostly in place and they are beginning to develop the collar feathers on their necks that are the key indicator of gender.

 
 This four week old chick is the tallest and has the most developed tail feathers. The photo shows the neck and the difference in these collar feathers is that roosters have pointed feathers and hens more rounded. It would seem from this photograph that at four weeks it is possible to deduce that this bird is a rooster. For some of the other chicks it may take a week or so longer.

 
 In the foreground the two hens have the darker necks with rounded collar feathers. The roosters in the background have lighter but more pointed ones.


Another interesting difference with Light Sussex chooks is that pure-bred birds have grey legs - such as the rooster in the background while birds that have been crossed somewhere with a Coronation or other Sussex have orange legs. All this year's chicks were born with orange legs so I will have to wait to see if and when the grey kicks in.


Wednesday, October 14, 2015

Shading the Hot House

 
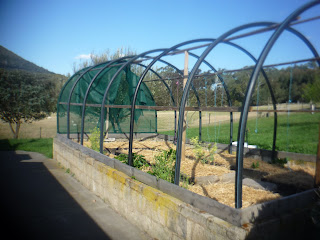
We call it the hot house but it is designed to stay draughty. It does get cold at Opportunity Farm and it has even been known to snow at Christmas so frost sensitive plants can have a rough time. One year we had three false starts and had to replace the zucchinis each time. Green tomatoes are the norm around here and only the last couple of years has it been warm enough for long enough to ripen them on the vine.


The idea behind this enclosure is to keep the birds off, prolong the life of the summer plantings and to increase the range of food that we can grow and for how long. In the morning the house shades much of this structure. By stapling shade cloth across the end it will protect the plants within from almost all frosts. With shade cloth at either end the breeze will be able to pass through and avoid temperatures inside that will desiccate the plants and require copious amounts of water. That is the theory, anyway. This project has been a slow one but with beds established and mulched, shade cloth up, a door on and pathways formed it is time for some planting.


See the blog post published 364 days later to see the next stage!

Tuesday, October 13, 2015

The Beauty of Nature

Sometimes it is easy to get too focused on productive plants and stress about slaters eating the tomato seedlings or which variety of zucchini should be planted where. Other days it is just head down and mow or whipper-snip or dig.
 
But when I can look up and see the glory of cascading purple wisteria flowers and the deep reds of a waratah then I am reminded of how plants can also make my heart sing and my smile wide.
 
Our area is famous for the waratahs that flower in October and November. This plant is a Tasmanian Waratah which was planted to celebrate the birth of my second child and was fertilized by her placenta. From a small shrub it has blossomed into a large bush festooned with masses of beautiful flowers. Every spring it makes me happy to see it bloom.

Saturday, October 10, 2015

Chick's first moments


First there was a splinter on the side of the egg. A couple of hours later a small hole appeared as the chick used its egg tooth to batter away at its ovoid prison. An hour ago the hole was a little bigger and movement could be seen through the hole.
Then about five minutes ago the cheeping became much louder as the eggshell split in half and the chick emerged. The following video is a short documentation of a chick within a minute of its hatching.

 
Hopefully you can see Opportunity Farm's youngest chicken in action. Already the chick has headed off to the brooder to join its two older siblings. With any luck there will be more hatched by morning.

Wednesday, October 7, 2015

Weaning the Poddy Lambs

 
Lily our Wiltshire Horn Poddy Lamb
 
Lily is now nearly seven weeks old while Alice is five and a half. Both have been living full-time in the paddock with the other lambs and their mothers and father. When Lily first went she was forced to mingle with the family lambs but would come barreling towards me whenever I came into sight. Since she has been joined by Alice they can hang out together and at feeding time they just sit by the gate and wait.

 
Over the past week I have reduced the amount of milk that I feed Lily. She was getting a full 700ml bottle twice a day - the same as Alice. This evening she received just 300ml. She still seems plumper than her udder-fed peers and is ready to be reduced to one feed of 500ml a day.
 
The challenge will be to get her used to not hanging by the gate and hassling Alice for the one morning bottle. In another ten days if she looks healthy enough then Alice's feed will be reduced and eventually they will both be independent. 
 
Feeding the lambs is certainly a popular chore for our kids. They have even been known to sulk if they don't get to feed their favourite lamb. I think I will be quite glad when they are weaned, but it is satisfying to be greeted so enthusiastically by sheep in the paddock and to know that you have helped them to survive and thrive. 


Sunday, October 4, 2015

The Shearing Shed/ Workshop shapes up

 
We dismantled a collapsing shearing shed on a nearby farm. There was plenty of tin, round posts and assorted lengths of timber to be recycled. The aim is to build a shed that we can use to shear our small flock of sheep, hold a workshop in and have some space where visitors can roll out a swag.
 
Working with tree trunks for posts is always challenging as they are rarely straight. We have termites so I did not want to put the posts into the ground. So each post is set on a concrete stump set lower than the stumps that hold up the bearers for the floor joists. By chiseling out each post where it meets the sub-floor each of the nine large posts can be locked in and the frame is stronger.
 
 
The south facing wall has a doorway framed with straight timber which will be where the sheep enter the shed to go into a holding pen. The pulleys and rods seen through the doorway are an authentic working shearing plant from the original shed. This will be mounted on the west wall but will be for aesthetic reasons only - Michelle will shear with an electric handpiece powered by a generator. By recycling the tin and timber and framing the shed with round poles we hope it feels as if it has been there for a while.

 
There is a big window to go in the north facing wall which is not a feature of an original shed but should let plenty of light in and allow visitors a good view down the valley. Plenty of work to go but the project is at an exciting stage where the shape and feel of the shed is emerging.

Saturday, October 3, 2015

Clipping the wings of chickens

If you have chickens and don't want them to fly the coop, then you will need to clip their wings.
All you need is a clean, sharp pair of scissors and a chicken.
One of our flocks at Opportunity Farm usually lives out in the paddock in our chook tractor with an electric netting fence around it. As the fence is only three feet tall clipping the wings is important. So this morning I caught each chook and checked the status of their wing feathers.


The only feathers that need to be cut are the primary feathers on one wing. These are the longest ones that are closest to the front of the wing when it is spread out. There are generally about nine or ten of these.


After fanning out the feathers I cut them close to where the secondary feathers start - about two-thirds of the way down. If you cut them longer you may cause bleeding but at that length the chook will not be bothered - except by the fact that it can't fly!
 
 
This is our rooster with his feathers clipped ready to return to his coop. The feathers will regrow and need trimming again but it varies from breed to breed and at what time of year you are clipping as to how long you can safely leave it between clips.
 

Friday, October 2, 2015

How to raise a Poddy Lamb or two


We have only a small flock of sheep - mostly self-shedding Wiltshire Horn sheep, but we also have a growing collection of coloured Merino and Crossbred sheep. The Wiltshire Horn ewes are a hardy bunch and normally birth with few complications and are good mothers.
Sometimes however the weaker of twins is rejected and if we find it in time we end up with a poddy. Or a local farmer with a soft heart wants to keep an orphaned lamb alive but hasn't the time to raise it.

Larger scale sheep farms often have a set-up with a designated pen and buckets with multiple teats to raise a commercially worthwhile number of lambs. We start off with a large cardboard box in front of the fire. As long as you put some bedding in it and don't keep the lamb in there so long the urine soaks the bottom out, it works well.

The most important thing for a newborn lamb is drinking some colostrum - the initial milk which is filled with antibodies, fat and protein to protect the newborn. If your poddy lamb did not get any of this from its mother then its chance of survival is lower.
We try to keep some calf colostrum in the freezer for such emergencies (cross species colostrum is way better than no colostrum). If you haven't any, try a local dairy.

In spring our local supermarket stocks plastic teats suitable for lambs. If desperate a baby's teat will do but lambs need a much longer teat to be able to suck it comfortably without assistance.

 
The teats can be carefully stretched over any sort of glass bottle. We started off with a 330ml juice bottle and have moved on to a 750ml ginger beer bottle. Only for the first 24 hours do lambs need four feeds, then for two weeks it is three feeds so we found it worked with 7am, 2pm and 9pm and wasn't too disruptive.
If you have a milking cow you could feed them your excess otherwise you will need some formula. Our local farm store sells a premium milk replacer designed for lambs. One 16kg bag will feed two lambs to weaning. The instructions about how much to use is given on the packet. I boil the kettle, put the approximate number of scoops in the measuring jug and pour in water to about a third of the total volume required. This is topped up with cow's milk but it could be tap water. This works out at a warm temperature suitable for a young lamb.


Lily the Wiltshire Horn poddy in the enclosure on the verandah.
 
Once the cardboard box in front of the fire is heading beyond its use by date I build an enclosure. This year it was on the front verandah and used a corner as two walls and two large wooden sheets as the other two. A toybox and a desk were used to hold it together. Here I have to confess that the my teenage daughter, in her role of designated bottle feeder, managed to overbalance and collapse my enclosure on herself without hurting the lamb but breaking her arm in the process. While this was a distinct pain for her the consequence of my hasty construction was not having assistance with the feeding!
This enclosure needs some plastic on the base to trap the urine and plenty of fresh bedding, which will need regular changing.
I also made an outdoor enclosure. We have two dogs that like to pester lambs so it needed to be dog proof and mobile. This was made from a 6m length of pig fencing surrounded by some chook netting.


Lily and Alice (a crossbred) in the outdoor enclosure.
 
After three weeks the lambs are introduced to the paddock and the rest of the sheep by day and returned to their enclosure at night. They tend to hang by the gate when it is close to feeding times or if I am close but they gradually learn to explore and copy the other lambs in eating grass. By four weeks they stay in the paddock full-time. The quantity of milk is gradually reduced until they are about six weeks old and can feed themselves.
 
It is quite a responsibility to take on a poddy but children love the soft cuteness of lambs and are often keen to do the feeding. We make sure that new lambs survive three days before we give them a name as that is the danger time. Once you are set up for a poddy it is just part of a routine and an enjoyable way to raise an animal. Having a poddy or two in your flock can also help when you want to move or call the sheep.


Wednesday, September 30, 2015

Growing Mushrooms in the Pantry

 
I love mushrooms and most of my little cherubs do to. The offerings in the local supermarket tend to be at the end of their cycle and turn dried out and withered before you can top a pizza. So I was delighted when Michelle came back from a hardware store with a mushroom kit.
It seemed simple enough to mix the two packets together and put in a cool dark place for a while. The instructions stated that the compost needed to be kept moist. It is hard to know exactly how much water to apply but I give it a squirt with the same bottle I moisten the seedlings. Fitting it into a routine helps make sure I don't forget the box in the darkest corner of the pantry. Clean dishes... wipe surfaces...water seedlings... squirt the mushrooms.
For about five weeks nothing much happened. Then a little ball appeared which grew into a tasty mushroom. Since then sporadic burst of fungus have appeared and been devoured. Long may it last. 
 

Tuesday, September 29, 2015

Fermenting in the Kitchen

 
Today there was lots of activity in the kitchen. Michelle was preparing 12kg of different sauces for a scout camp on the weekend but there was also a lot of fermentation going on.
 
The kombucha tea needed bottling and a fresh batch prepared to feed the scobies. The shredded cabbage needed to be put into jars for sauerkraut. The kefir needed making with more raw milk and the sourdough culture provided the basis for a loaf of bread. The currant wine just felt like being in the photograph on the ground that it was fermented before being bottled back in January.
 
More about how to actually make these products in later blogs.


from l-r: Kombucha tea with  floating scoby, 2015 vintage currant wine, sauerkraut jar, kefir bottle - sourdough in covered bowl. 

Looking after freshly hatched chicks


Once the chicks hatched they flopped about in the incubator all sticky from the inside of the egg. I left them there for a couple of hours until they began to dry out. Then they were transferred to a brooder box. Mine is made from an old deep drawer with the back panel missing. I put a tray inside the drawer which I filled with sawdust from the workshop. This makes it easier to clean out and change the sawdust.
The side of the drawer that is missing is placed against the shed window so my little kids can watch the chicks grow without having to open a stiff shed door.


The chicks need a heat source. I purchased a 75W heat lamp on eBay for about $20 which comes with a stand that allows the bulb to be raised as the chicks grow (otherwise they get singed heads!).
They have a feeder that allows them to get their heads in to feed but not to stand in. They still like to perch on the wires and poo into their feed, though. I use commercial chick starter feed from the local farm store - in our case, Landmark. Each day I add feed and sometimes clean the feeder so that the poo is removed.
The water feeder is an inverted plastic lemonade bottle screwed into a trough that allows chicks to drink but not to drown. Apparently they can find all sorts of ways of committing suicide if you are not careful. I place the trough up above the sawdust so that the water is at beak height and the sawdust does not clog the water.
As long as the power does not go off and they have plenty of food and water they have all they need. I check them once a day mainly to marvel at how much they are growing - the ones in the picture are eleven days old. One is developing a tail and they are all getting the black and white wing feathers of the Light Sussex breed.
These chicks will spend about three weeks in this brooder box as hopefully the batch will be hatching and need the space. After about ten days they are active enough to need a net over the top to prevent the chicks hopping out as they test their little wings.