Showing posts with label Timber. Show all posts

Tuesday, May 2, 2017

A useful Wwoofer - the sealed in shearing shed!

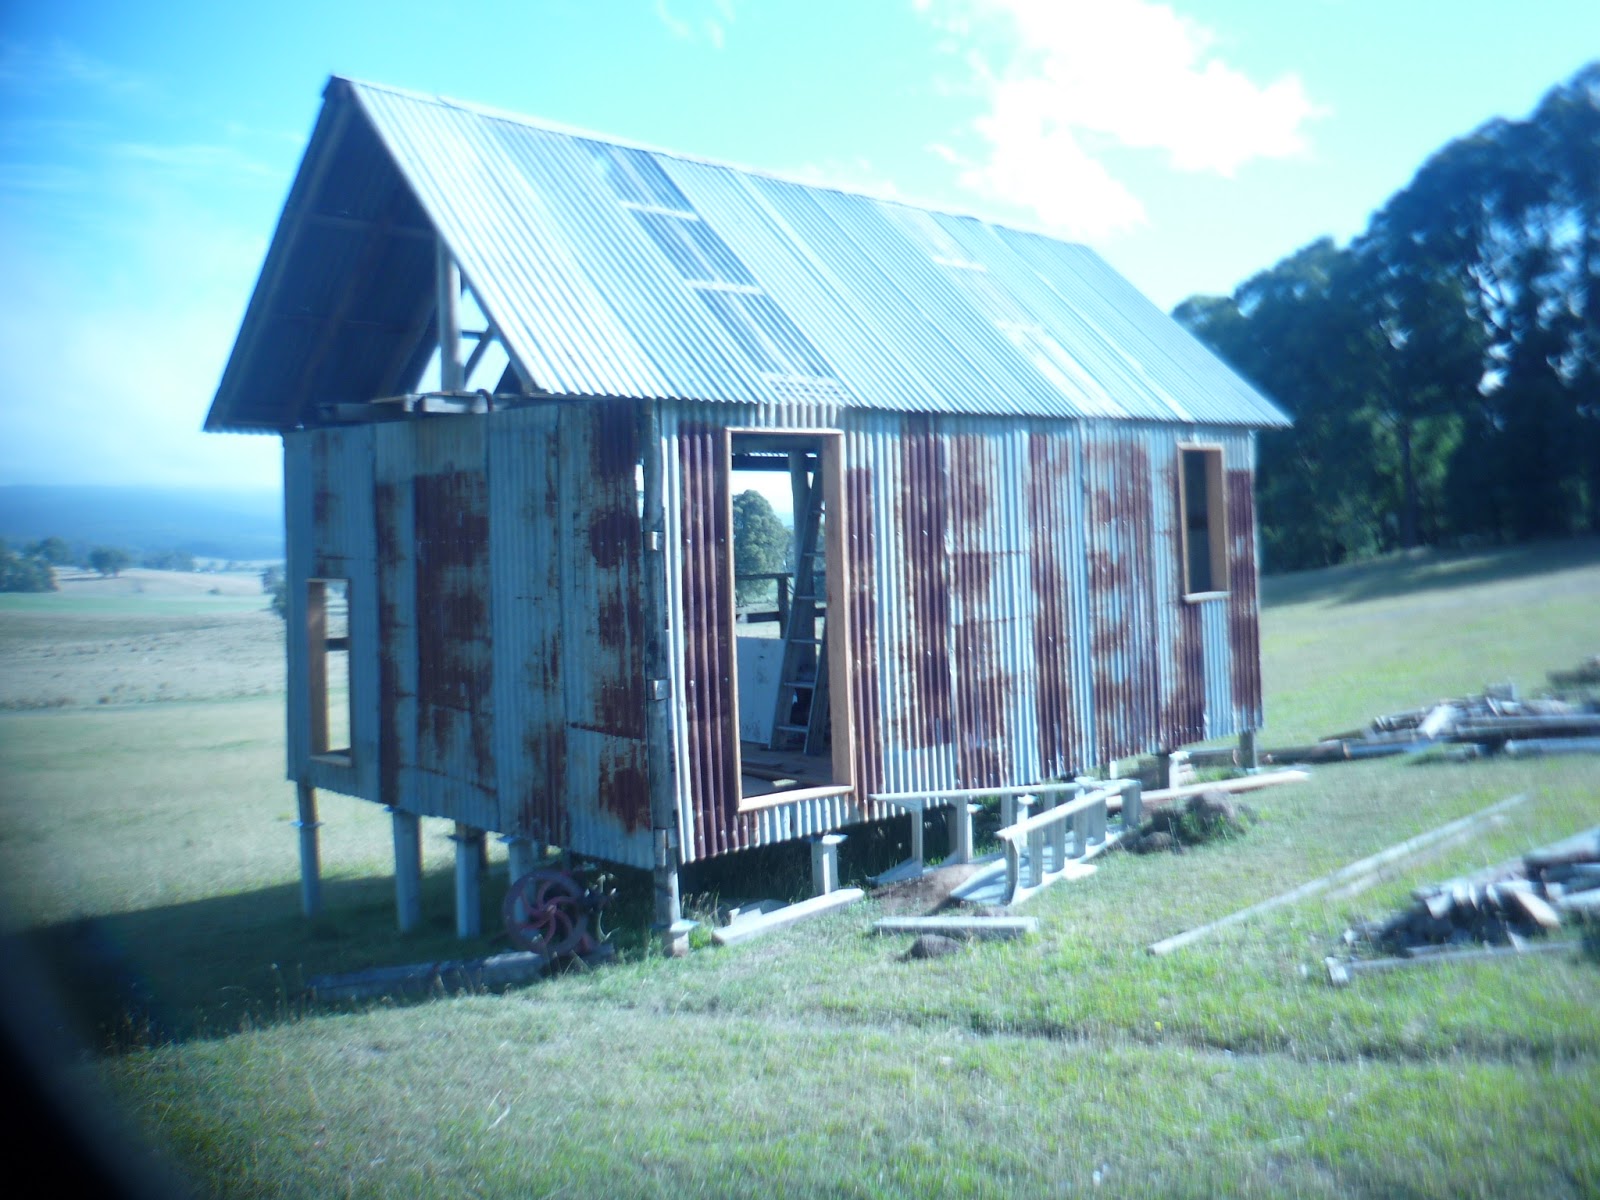
Our shearing shed has been a fair while in the construction. First we advertised for an old shed to pull down. We found an almost collapsed shed on a friend's farm and several weeks of dismantling scored us the materials. Then stumps were put in, floor joists and a frame of old round timber was built. These were notched together to make them strong and clad in old tin. Last January we put the roof on and now the shed is ready to be sealed in.


The final wall had to be clad with tin. The only tricky part was that it was about four metres off the ground. While building there had been a temporary platform across the open part of the shed. I could use this to make the frame for the top of the wall and then I had to dismantle it so that the tin could be fixed from the outside. The topmost screws were a challenge but a long ladder with a wwoofer on the bottom made it safe.


Having a wwoofer who was a furniture maker who came with lots of tools meant that hanging the final few doors and windows was a breeze. The job was probably far more professional than I would have done. With a new back door and four windows in, finally the birds and most of the draughts are excluded. Now we can plan the final touches before we use it.


Tuesday, April 5, 2016

Spoon carving and turning


"Made in the Woods" is a biannual event where traditional skills are taught and practised in a bush setting. I have attended three over the past few years and I find I am always drawn to spend lots of time with the spoon carver, Jeff. He is the one in the traditional terry towelling hat. He spends about half his time earning money from teaching spoon carving workshops in Australia and this year will be presenting at Spoonfest in England. Check him out at www.spoonsmith.com.au.
Anyway, the basic skill is to split a log into about four or more sections. This is shaped roughly with a very sharp axe or tomahawk. Finer cutting is done either with a draw knife on a shaving horse or pony or a sharp hand knife. I love the shaving horse so I tend to hog that for making my spoons. The horse is the device to the right where the guy is seated. His feet are pushing a slide that grips the wood near his hands so he can shape it by drawing the two handed draw knife towards him. For protection from these sharp tools he is wearing a leather apron.
 
 
The final part of making the spoon is to use a hook knife (one with a specially made curved blade) the helps to gouge the concave bowl of the spoon from the wood. This gives you blisters but makes the spoon come to life.
 
Another traditional tool used by Jeff is the pole lathe. Following my first time at "Made in the Woods" I returned to Opportunity Farm so fired up with enthusiasm I constructed my own shaving horse and a pole lathe. I haven't made much time to use it since so on this workshop I was determined to have a go.


The lathe is powered by your foot that pushes down on a pedal and turns the wood which is pulled back up traditionally by a springy pole (hence the name) or in a more modern way, an elastic cord. The trick is to scrape the turning branch with a sharp tool on the downward push and then ease on while it is turned back by being pulled upwards.  Here I made a ring by cutting in from both sides until the ring came clear but was trapped by wider wood on each side.

 
This is the wood after being removed from the lathe. The bolus has been sawn off above the shaft ready for gouging out with the hook knive. The ring is purely decorative but it was a good exercise in using the lathe. Since my return to Opportunity Farm I have set up my lathe and have a turn whenever I make the time.

Making Bush Furniture

I spent an weekend with a bunch of amazing people all interested or skilled in traditional crafts. Set up in a clearing in the bush we five crafts: blacksmithing, weaving, spinning and dieing, spooncarving and bush furniture making. I spent time with most of these but this post focuses on the construction of bush furniture.
 
 
This is the start of a rustic bench seat. First a slab was hewn with a hand saw from a dry log. then four short legs were cut and the ends shaped with a draw knife to the same diameter. Four holes were angled in the base with an auger. Each leg had a split cut in the shaped end and a wedge placed in the top of the split. When the legs were fitted and driven home the wedge caused the leg to grip tightly.
 
 
The bench now has its legs and two slots were augered into the top for the back of the seat. The slots were made with two auger holes side by side with the middle chiselled out.


This lady made a ladder out of green timber. The frame was made by splitting a straight length of branch in half. The ends of the rungs were all shaped on the shaving horse (below) to the diameter of the auger holes. Once these were fitted a peg was hand made to keep the ladder together.
 
 
A ladder rung being shaped on the shaving horse.


This guy made a stool. The seat was cut as a slab from a dry piece of hardwood. Three legs were shaped with the draw knife and slotted into holes augered all the way through the seat. Three other pieces of green wood were cut to keep the legs apart and rigid.

 
The legs were pushed up through the holes to sit proud of the seat. A slit was cut in each one and a wedge driven into to seat level. The slits had to be cut perpendicular to the edge of the seat or the corner could snap off.  Any part of the leg still above the seat level was cut off.

 
The completed stool.


Monday, February 8, 2016

Shearing Shed Details

 
Shearing Sheds need a pen to hold the sheep about to be shorn. This has a gate that swings both ways so that the shearer can enter the pen, catch and drag out a sheep while the door swings closed. The photo below shows the pen and doors in an abandoned shearing shed near to Opportunity Farm.
 
 
Our shed only needs to cater for a small number of sheep. Our pen can hold about five while more can be brought in through the door via a ramp at the back of the shed. The pen is constructed from materials from the abandoned shed. 

 
The floor of the pen is slatted which allows the urine and the excrement from the sheep to fall to the ground beneath the shed while being solid enough that the sheep don't get their hooves stuck in the gaps.

 
Once the sheep has been dragged out of the pen the floor of the shed where the shearer shears the sheep has to be smooth and solid to ensure that the fleece and other sections of what is shorn can be swept up and that the wool does not catch on rough surfaces. This floor has to be easily and regularly swept so I have used a variety of pine and hardwood tongue and groove flooring. It was not easy to put together as the grooves didn't match, the flooring was a variety of sizes and because the shed is not square the shape of each piece near the edge was unique. 

 
This is the board of our shed. A couple of the planks are darkened as they were rescued from a house that was badly damaged by fire and the flooring coated in soot and ash. Still it all has a new home and a new lease of life.

Sunday, January 31, 2016

Finding what we need for the Shearing Shed

 
Our Shearing Shed is almost entirely made from materials recycled from sheds no longer in use and collapsing from old age. Our main source was a shed which had all the internal parts removed leaving a shell that had no integrity and started to fall over. Some of the rusting but solid tin from this shed has now been fixed on three sides of our 'new' shed but we lacked some of vital fittings.
 
Today we hit the jackpot and found a dying shed on a neighbouring property. Some of the roof was missing and it was starting to lean. 
 
 
Despite the dilapidation there was a wool table in decent condition and plenty of internal panelling and gates. For our five sheep we only need two short lengths of wall panels and one gate.


The internal panelling waiting to be removed and rebuilt for a second chance at life.
 

Last year Michelle tried to buy a wool table at a clearing sale but it went for an astronomical price. As she had waited all day with a bunch of hot and bored kids she bid high but in vain. Sometimes the solution is under your nose and only takes a bit of asking the right questions to the right people. We had a great score and the satisfaction of knowing that a piece of local history gets a chance for a new life.

Monday, January 11, 2016

Rafter Raising


The Shearing Shed/Workshop is now topped by nearly all of the rafters. These are round poles felled in the early 1950s and used to hold up the roof of the original shearing shed that I demolished. They are getting a new lease of life over sixty years later and help make our shed look authentic and old.

It wasn't easy to fix the rafters to the ridge pole as it stands over four metres from floor level but a temporary floor across the open side made it possible.

 
As the shed is definitely not square the end rafters will need to be carefully measured so that the tin fits. Roofing iron needs to be put on square or the edges start to get jagged.

Sunday, January 10, 2016

The Shearing Shed/Workshop Takes Shape

After several months of being too busy to make progress on the new shed it was time to get stuck into it. Helpers were organized and materials and tools readied.
Then it started to rain. Three days later it dried up enough to allow work to commence. The walls needed the framing completed. Downstairs there are four windows, two doors and a chute that have to be framed with all the timber notched into the round pole posts. While that was happening our willing wwoofer was screwing down the flooring. This might have been an easy task if the building was square and the timber the same size. Some planks had dried more at one end so they were a centimetre thinner than the other end. A large triangle piece was added to assist with making the floor squarer and the planks alternated to reduce the impact of the unequal drying. It looks good but the whole floor will need to be lifted and moved to reduce the gaps caused when the planks shrink fully. Hence the flooring screws rather than nails.

 
The upstairs flooring is cut and fixed.

The upstairs flooring is seasoned planks from the old shed we pulled down so it was much easier to lay them down and nail them. This gave a platform to work on the ridge pole. The three round poles were not quite tall enough to allow movement upstairs so an extension was fitted on each pole before the ridge pole was fitted. The next job will be adding the rafters.
The end walls were both sheeted with iron and the hole for the chute was cut out with the angle grinder. Progress at last!
 
The recycled tin being screwed on to the end walls.


The shed as at 9th January.

Sunday, October 4, 2015

The Shearing Shed/ Workshop shapes up

 
We dismantled a collapsing shearing shed on a nearby farm. There was plenty of tin, round posts and assorted lengths of timber to be recycled. The aim is to build a shed that we can use to shear our small flock of sheep, hold a workshop in and have some space where visitors can roll out a swag.
 
Working with tree trunks for posts is always challenging as they are rarely straight. We have termites so I did not want to put the posts into the ground. So each post is set on a concrete stump set lower than the stumps that hold up the bearers for the floor joists. By chiseling out each post where it meets the sub-floor each of the nine large posts can be locked in and the frame is stronger.
 
 
The south facing wall has a doorway framed with straight timber which will be where the sheep enter the shed to go into a holding pen. The pulleys and rods seen through the doorway are an authentic working shearing plant from the original shed. This will be mounted on the west wall but will be for aesthetic reasons only - Michelle will shear with an electric handpiece powered by a generator. By recycling the tin and timber and framing the shed with round poles we hope it feels as if it has been there for a while.

 
There is a big window to go in the north facing wall which is not a feature of an original shed but should let plenty of light in and allow visitors a good view down the valley. Plenty of work to go but the project is at an exciting stage where the shape and feel of the shed is emerging.

Friday, June 5, 2015

The Roof is Off

After three and a half days of dismantling, all the roof from the shearing shed is down. All the decent pieces of tin have been removed to our paddock and the piles of useful timber remain on site to be denailed, trimmed and then driven home.
Removing the shearing plant remains a challenge. It was working well when the shed ceased to be used about thirty years ago. Michelle will be using an electric handpiece to shear our sheep so the plant would only be decorative and suitably authentic. I am going to try to bring down two plants and the flywheel in one piece. However today's efforts ended with the crowbar flying back into my face and chipping my tooth. Having been so careful with all the flapping tin and timber balanced over my head it was a bit of a smack in the face!
Next time I go out there I hope to have the chain saw back from the repair shop as it could prove very handy in dropping the final posts and maybe cutting up some post for firewood.  


Sunday, May 31, 2015

Progress on the Shearing Shed Dismantling


This was the front of the shed. The building at the front has to be removed as the roof is attached to the shearing shed and the roof is poised to collapse. The door will be a useful score to build into our new shed.

The shearing shed back to its bare bones with just the roof poised and hanging overhead. The shearing plant is still attached in the centre. Apparently it was still operational when the farm changed to cattle thirty years ago. I will try to salvage some of this just for authenticity. The piles of timber will be denailed using the reciprocating saw before being loaded up for the half hour trip back to Opportunity Farm. The scraps will be burnt or dragged off to the tip.


This was the rear of the shed. The back wall has collapsed and much of the tin from this side of the roof is twisted and tangled. The roof is held up by four enormous log poles that are set deeply into the ground. When the shed has fallen one of these posts has burst through the roof.

Now all the tangled tin is removed and most of the rear of the shed roof is dismantled. The longer round poles in the foreground are to be rafters in our new shed while some of the fatter wall poles will do the same job in the rebuild. The challenge is to gently collapse the front part of the roof without dropping it on my head.


Tuesday, May 12, 2015

Wanted: Timber/Tin Shed for Removal


We need another shed. This one is to be multipurpose - a shearing shed, a workshop space, a storage shed and a place where visitors could roll out a swag if they don't fancy camping.
We want this 6m x 4m shed to look more like an authentic Monaro shearing shed in both the design and the materials. So we put up some posters in the local town asking if anyone has a shed we can pull apart. There are plenty of farms that have changed a lot since the heydays of the 50s and 60s. Back then farms had farmworkers and plenty of money coming in as Australia 'rode on the sheep's back'.
Before anyone could answer our request Michelle asked a farmer friend if he had any spare sheds in need of a new life. He replied that he had just the thing. This farmer only raises cattle so the 60 year old shearing shed had been lying idle for a while. A strong wind had all but collapsed it about a year ago and he hadn't had the time or the inclination to pick up all the pieces. We were welcome    to it and a more recently built and collapsed hay shed was thrown into the deal.

We went and had a look at his shed and while it has certainly seen better days it is ideal for our purposes.


The rusty tin will look fine on the walls and there should be enough framing timber for us to use. I like the idea of using the original round timber posts to hold up the roof as well as the pole rafters. It will take a while to dismantle and sort out what is worth bringing back to Opportunity Farm but in a few months some parts of this old shed will gain a new lease of life.

Saturday, May 2, 2015

Using Homegrown Timber

 
With over 300 acres of forest on our bush block wood is a resource we have in spades. Aside from firewood collection there are plenty of uses we have found. All the framing on this caravan shed was cut from the property and held together with strapping and clouts. As with fence posts the best timber is Red Box (Eucalyptus Polyanthemos) which is almost termite resistant. Luckily the geology of our site means that there are plenty of these trees close to the house.


 Our homemade house was constructed in two parts. One is mudbrick made from soil dug to create the space for the house with timber poles holding up the roof. The second part was made from local timber milled 35km up the road but the verandah posts were cut from a Blue Gum thicket about 100m below the house. Once the bark dried off the paths of borers were revealed showing a beautiful pattern as a feature.

 
We also used radially sawn timber - a technique designed to get the maximum amount of wood out of the saw log. Each piece also has an uneven edge on the thickest part that looks more natural and organic.


We have also used our timber for green woodworking and more recently spoon carving. It is still a fantastic renewable resource despite most of it being singed or burnt in last year's major bushfire. If time allows I would love to use it more - making shingles would be a project I am keen to try.